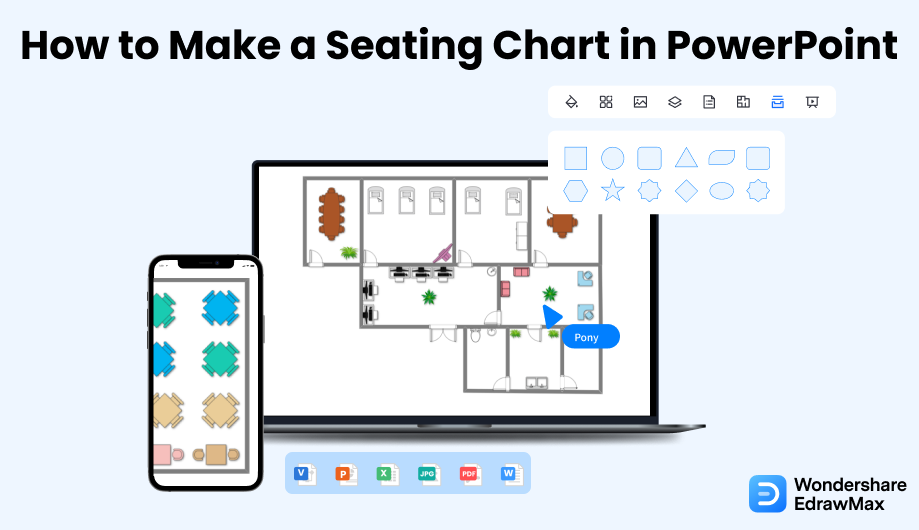
EdrawMax specializes in diagramming and visualizing. Learn from this article to know everything about how to make your seating chart in PowerPoint and easier way. Just try it free now!
Try It Free Switch to Mac > Try It Free Switch to Linux > Try It Free Switch to Windows >Ever since the world got hit by the pandemic, the local authorities have instructed new guidelines about seating arrangements. In India, the government is instructed to follow a 6-feet distance in public places. Similarly, the United States stated that every public restaurant should follow COVID-19-related guidelines. As a result, several public and personal properties changed how people came and sat at their respective places. This new seating aspect gave rise to people looking to easily make a seating chart and share a seating chart in PPT format with their colleagues.
In this article, we will learn how you can easily make a seating chart in PowerPoint, the easiest way to create a free seating chart, and how EdrawMax should be your go-to tool if you need to share the seating plan in PPT format with your client or colleagues.
Sharing a seating chart in PPT format serves many purposes, like:
Now that you have seen the importance of sharing the seating chart in PPT format let us show you ways to make a seating chart in PowerPoint.
As the first step of creating a seating plan in PPT, open the application. Go to the start menu and click on the PowerPoint Presentation option to start the program. Alternatively, if you have its shortcut on the desktop or taskbar, use it and launch the application.
Once the window is open, you will generally find the title box and text box on the slide. Go to the 'Layout' tab and select the blank option to open a blank presentation without the boxes. You will get a single blank slide ready to draw a seating plan in PPT.

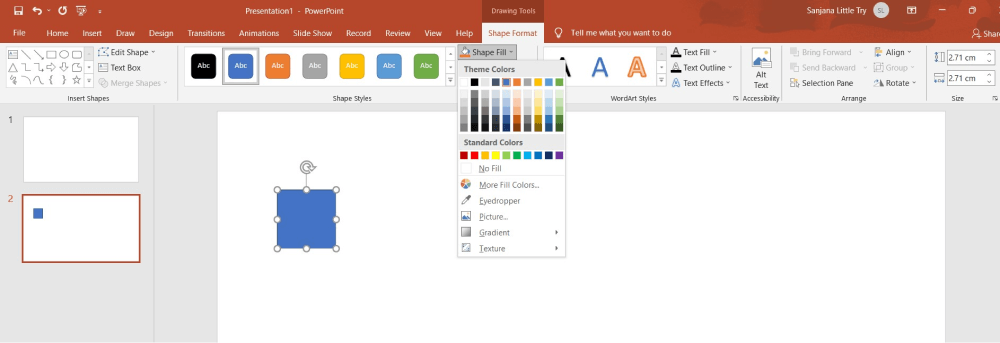
For the further step of the seating plan in PPT, go to the 'Insert' tab and insert a rectangular box into the blank slide. Then go to the drawing tools format tab and set the sizes in the 'Size' option. Create the sizes to define a reference for real-life measurement. Now enlarge the box and give a border to it. After choosing the box, select the option 'Shape Fill'.
Now choose white, and set the borders for it by clicking the Shape Outline option.
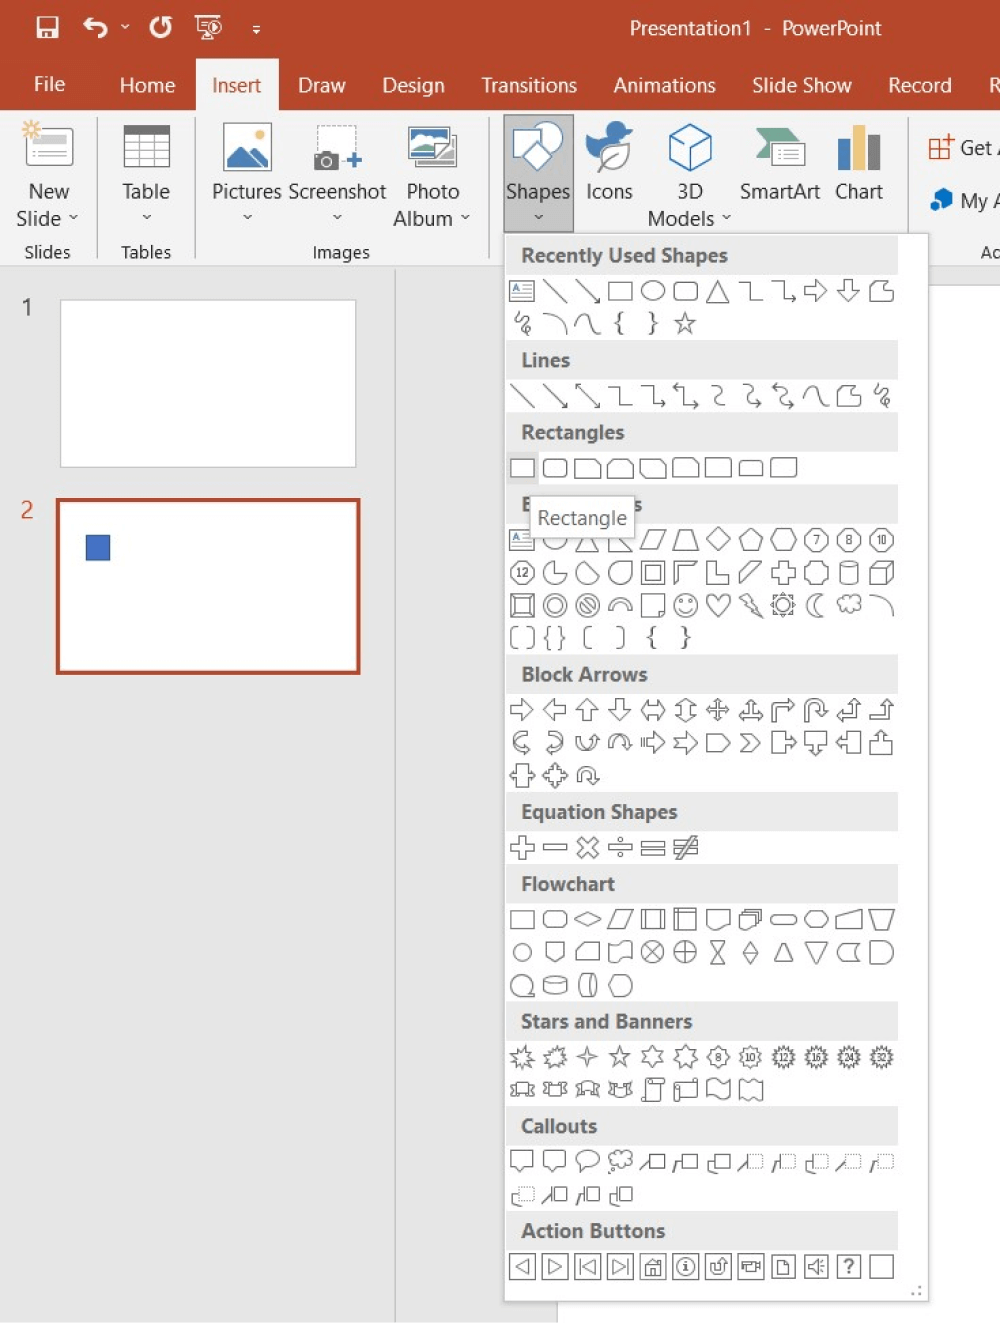
Now select shapes and sizes to draw the seating arrangements inside an office. Choose your desired rectangular boxes and create the seating arrangement inside the borderlines. Now click the 'Insert' tab. After that, click on the 'Shapes' option. Select the shape you want from the drop-down menu that appears and draw the plan.
Finally, you need to save the plan before you exit. Go to the 'File' tab, click on 'Save As' option and provide the file name and the location you intend to save.
As you saw here, even though you can create a seating plan in PowerPoint, the design will not be recommended for professional endeavors. Instead, what you can do here is to create a seating plan in EdrawMax and then export the same plan in PPT format. By doing this, you will have multiple seating plan designs ready with you, and at the same time, EdrawMax will let you have a better presentation right from the drawing screen.
Now that you have seen the overcomplicated process of creating the seating plan in Word let us show you how quickly and effectively you can draw the same chart in EdrawMax.
The very first step that you need to follow is to install EdrawMax in your system. Go to EdrawMax Download and download the seating plan software depending upon your operating system. We also have Android and iOS options if you need to use your mobile device to create the seating plans. At the same time, if you need to have remote collaboration, head to EdrawMax Online and log in using your registered email address.
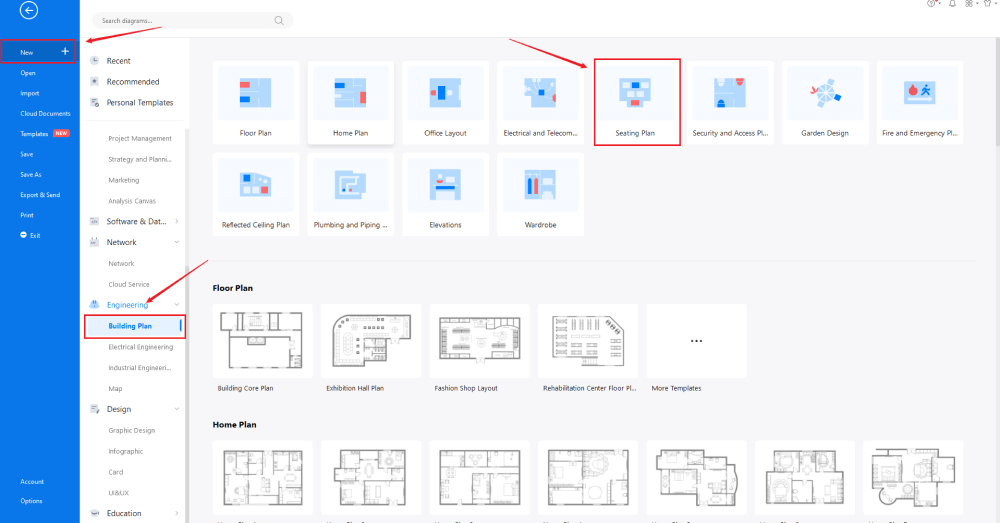
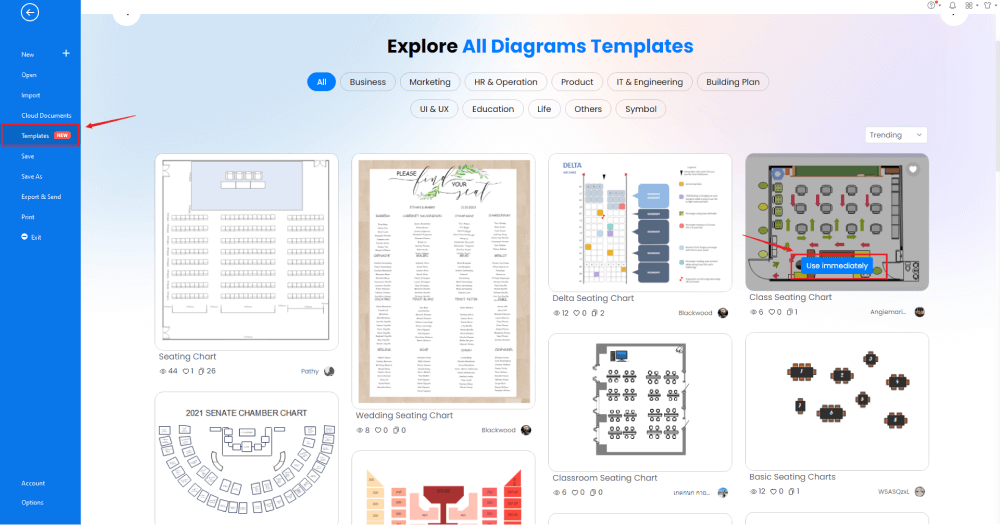
Now that you have logged in, go to 'Building Plan' in diagram-type and click on 'Seating Plan.' The system will open pre-built templates for classroom seating, conference room, restaurant plan, theater seating plan, etc. Head to the 'Template' section on the left side of the tool and type 'Seating Plan.' Check the seating plan template that comes closest to your needs and click on 'Use Immediately' to import the template's content into your EdrawMax canvas. You can customize the contents of the template based on your current requirements.
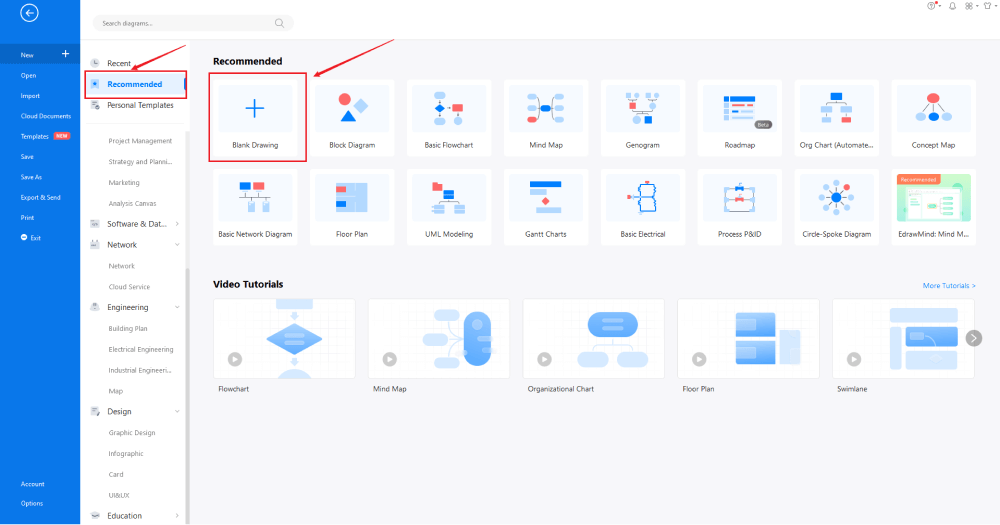
From the EdrawMax homepage, you will find the '+' sign that takes you right to the canvas board, from where you can start designing the seating plan from scratch. Use your technical expertise and the tools offered by EdrawMax to create the seating plan in PPT format.
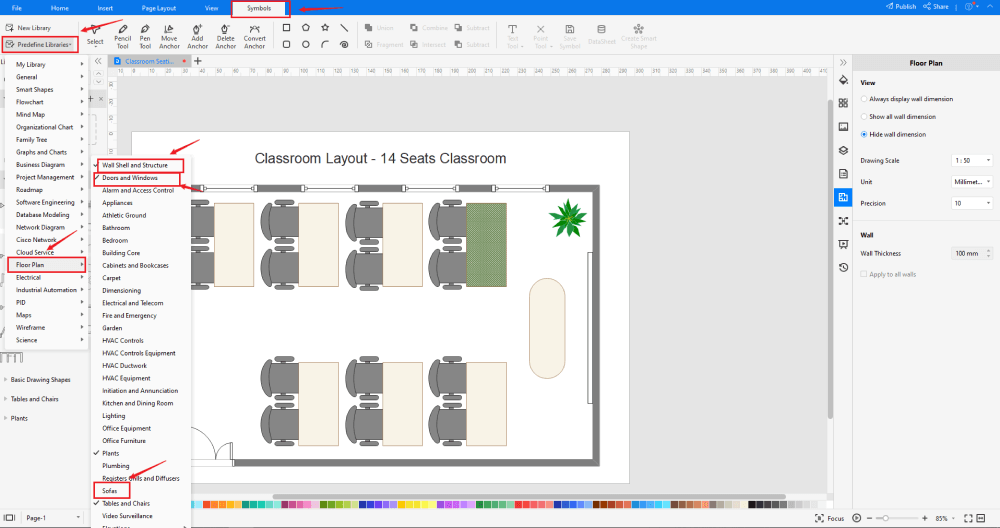
Head to the 'Symbol' section in the toolbar and click on 'Predefined Symbol.' Click on 'Floor Plan,' as it will open up several important floor plan symbols, including 'Tables & Chairs,' 'Sofas,' and 'Wall Shell & Structure' symbols. Click on the desired symbols to import them to your library. Learn more seating chart symbols and find symbols you want here.
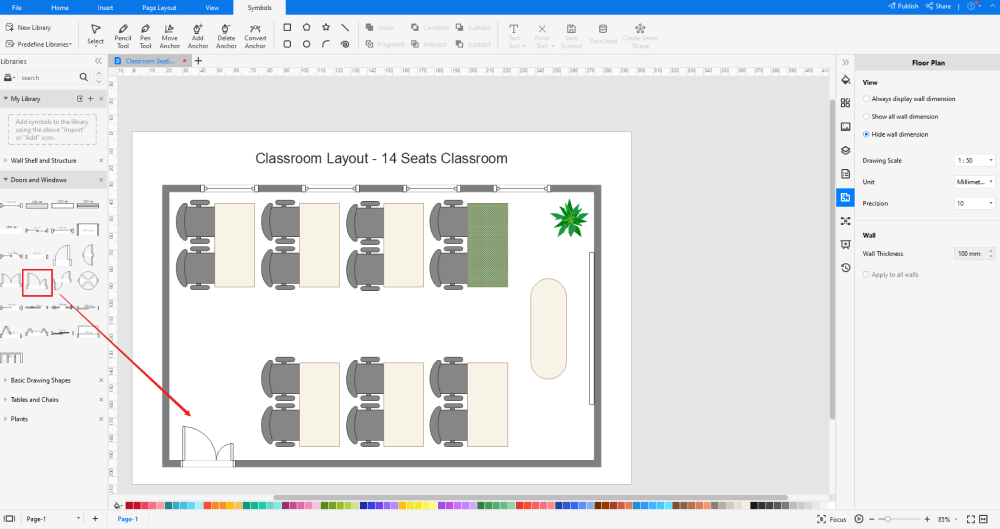
After creating the outline, you can start adding the basic components of the seating plan, like the bar counter, oval dining table, and others. If you are creating a wedding seating chart, you can add the details of the bride and groom. If you are creating a classroom seating chart in PPT format, you can add the classroom details. Depending upon your need and theme, you can modify these symbols without worrying about losing the formatting of the drawing. Then, use toolbars on the top or right side of canvas to change the color, font, size, theme, and more with one click.
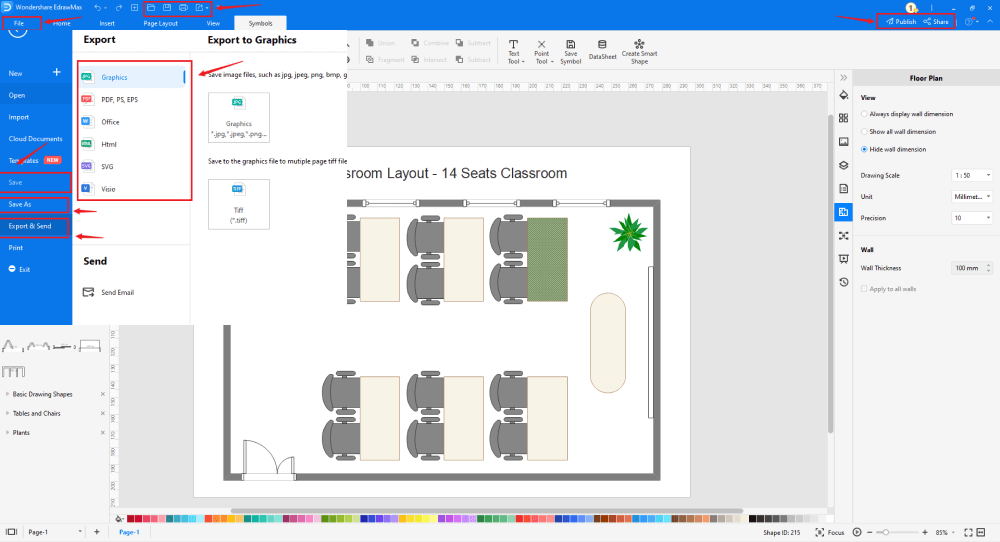
Once you are satisfied with your seating plan, you can export it into multiple formats, like JPEG, JPG, PNG, PDF, and other Microsoft formats, like MS Word, MS Excel, PPTX, etc. Just back to the main menu, and find "Export" button, You can also share the evauation chart diagram on different social media platforms, like Facebook, Twitter, LinkedIn, etc. Moreover, you can print your seating chart for showing with others.
Basically, it is simple to draw a seating chart in EdrawMax, just grab a template and keep customizing, drag and drop professinal evacuation symbols to make your plan better. If you are still confusing about how to draw a seating chart in EdrawMax, just check this seating chart guide, or check the video below.
There are several major differences between EdrawMax and PowerPoint, like:
EdrawMax includes a large number of symbol libraries. You may quickly build any type of diagram with over 26,000 vector-enabled symbols. If you can't locate the symbols you need, you can easily import some images/icons or build your own shape and save it as a symbol for later use. EdrawMax's vector-enabled seating chart symbols can be readily enlarged, reshaped, recolored, and reformatted to meet your needs. Simply go to the 'Symbols' part of EdrawMax and select the 'Predefined Symbol' section from the top toolbar. Hundreds of symbol categories are accessible for you to utilize and incorporate into your evacuation plan.
Moreover, EdrawMax features a large library of templates. We have more than 25 million registered users who have produced thorough Templates Community for each design. Simply go to the left panel's template section and type any template you're looking for into the search bar. It will bring up hundreds of pre-built templates that you may utilize right away to meet your needs.
Unlike PowerPoint, EdrawMax is predominantly designed and created to cater to all of your design needs. Some of the most amazing features of this free seating plan software are:
Create over 280 types of diagrams
Windows, Mac, Linux (runs in all environments)
Professional inbuilt resources and templates
On-premises software for business
Enterprise-level data security